")

Orchids have a reputation for being difficult, but the truth is that the most popular types thrive on benign neglect. The orchid family (Orchidaceae) is one of the largest in the plant kingdom, with more than 25,000 species worldwide, yet only a handful are commonly grown as houseplants. Of these, the Phalaenopsis or moth orchid dominates home collections because it tolerates typical indoor conditions and produces arching sprays of flowers that can last three months or more.
What makes orchids different from most houseplants is their lifestyle. The majority of popular indoor orchids are epiphytes, meaning they grow perched on tree branches in tropical forests rather than rooted in soil. Their thick, sometimes silvery roots are adapted to absorb moisture from humid air and periodic rainfall, then dry out quickly between soakings. Understanding this one fact explains almost every aspect of orchid care, from the bark-based potting mixes to the "soak and dry" watering approach. If you're exploring which plants to choose for your home, orchids are well worth considering once you get the basics right.
Choosing the right potting mix
Regular potting soil will suffocate orchid roots and cause rapid rot. Instead, use a coarse, fast-draining medium that allows air to circulate around the root system. The most common options are chunky bark chips (usually fir bark), sphagnum moss, perlite, charcoal, or blends of these materials. Pre-mixed orchid media are widely available and work well for most beginners.
Bark-based mixes drain quickly and provide excellent aeration, making them forgiving for anyone who tends to overwater. Sphagnum moss holds more moisture and works well in dry climates or for miniature orchids in small pots that dry out fast. The trade-off is that moss needs more careful watering since it stays wet longer.
Clear plastic pots are popular among orchid growers because they let you monitor root health and moisture levels at a glance. Healthy orchid roots look firm and silvery-green when dry, turning bright green after watering. Dark, mushy roots signal trouble. Whatever pot you choose, drainage holes are essential.
Beginner-friendly orchid varieties
Phalaenopsis (moth orchid) is the best starting point. Thick leaves store moisture, making it forgiving of irregular watering. Blooms can last three to six months, and reblooming is straightforward. Widely available and inexpensive.
.png)
Paphiopedilum (lady's slipper orchid) has distinctive pouch-shaped flowers and enjoys the same moderate light and even moisture as Phalaenopsis. It's slightly more tolerant of cooler conditions and does well on a north-facing windowsill.
.png)
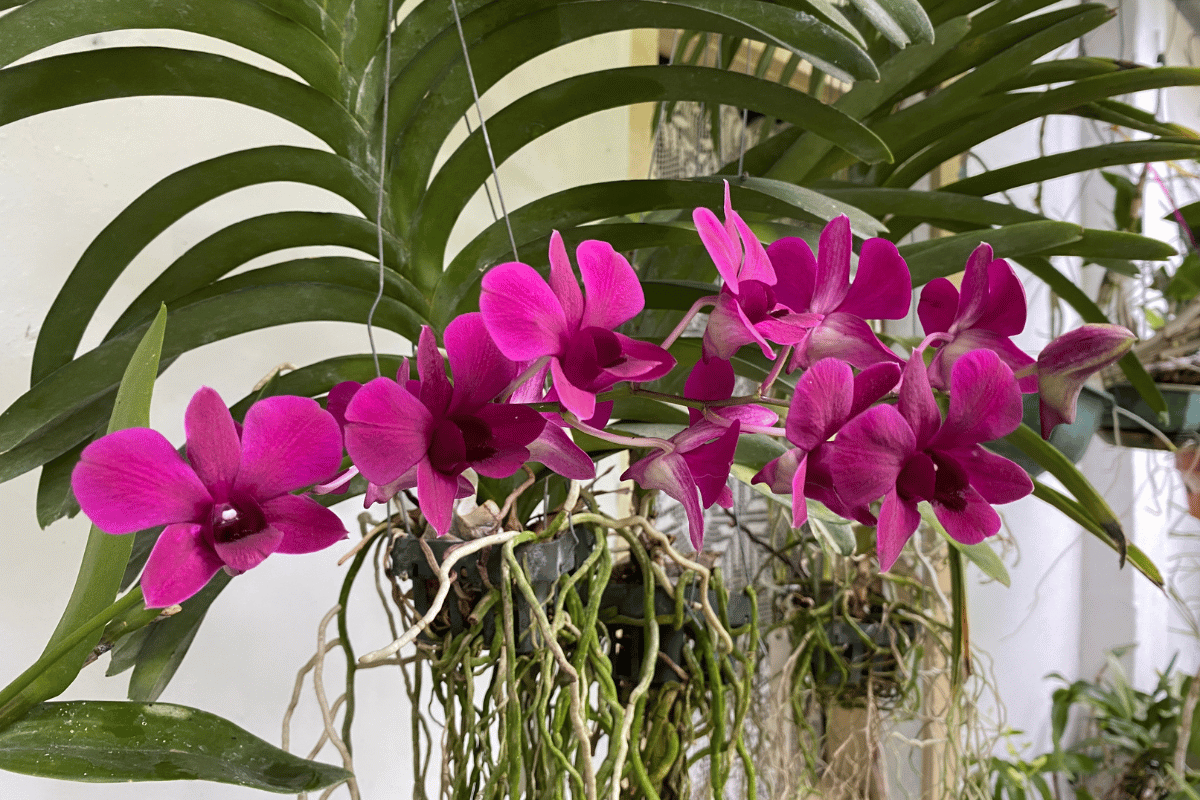
Dendrobium produces tall canes topped with clusters of colourful flowers. Most widely available types are easy to grow, preferring bright indirect light and a drier rest between waterings. Some varieties are deciduous and drop leaves before blooming.
Oncidium (dancing lady orchid) sends out sprays of small, often fragrant flowers. It appreciates bright indirect light and stores water in its pseudobulbs, making it drought-tolerant between soakings.
 .png)
Cattleya (corsage orchid) produces large, showy, often fragrant blooms but needs stronger light (3,000 to 5,000 foot-candles) and a more distinct cool, dry rest period in winter to flower well. Best for growers with a bright sunroom or supplemental lighting.
.png)
Cymbidium (boat orchid) is a cool-growing orchid that produces long sprays of waxy flowers. It does well outdoors in summer and needs cool nights of 7 to 13°C (45 to 55°F) in winter to trigger blooming. It prefers consistent moisture and more frequent feeding than most orchids.
.png)
Light and placement
Most indoor orchids need bright, indirect light, similar to what they'd receive under a forest canopy. An east-facing window is ideal for Phalaenopsis, providing gentle morning sun without the intensity that scorches leaves. North-facing windows can also work if they're reasonably bright. South- or west-facing windows deliver strong afternoon light, so filter it with a sheer curtain or move the plant 60 to 90 cm (2 to 3 feet) back from the glass during summer.
Leaf colour is your best diagnostic tool. Medium green leaves with a slight yellowish tint indicate the right amount of light. Very dark green leaves, while attractive, mean the plant isn't getting enough light to bloom reliably. Yellowish or reddish leaves with bleached patches signal too much direct sun.
For orchid types that need stronger light (Cattleyas, Oncidiums, Dendrobiums), intensity of around 3,000 to 5,000 foot-candles works well. Moth orchids bloom happily at a much lower 1,000 to 1,500 foot-candles. If natural light is limited, LED or fluorescent grow lights positioned 15 to 30 cm (6 to 12 inches) above the plants for 12 to 16 hours a day can fill the gap effectively.
Watering
Overwatering kills more orchids than any other mistake. The goal is to drench the roots thoroughly, then let the medium dry out almost completely before watering again. For most indoor orchids in bark mix, this means watering roughly once a week during active growth and every 10 to 14 days in winter, though the actual schedule depends on your pot size, medium, humidity, and temperature.
The best technique is to bring the pot to a sink and run lukewarm water through the medium for 15 to 20 seconds, letting it drain freely. Alternatively, soak the pot in a basin of water for 10 to 15 minutes, then lift it out and let all excess water drain completely. Never let orchids sit in a saucer of standing water.
Always water in the morning so any moisture on the leaves or in the leaf crown can evaporate during the day. Water pooling in the centre of a Phalaenopsis, where the leaves meet, is a common cause of crown rot and can kill the plant. If water does collect there, blot it away with a tissue or paper towel.
Use room-temperature water. Orchids are sensitive to cold water, which can spot leaves and shock roots. Rainwater or filtered water is ideal, but if your tap water is reasonably soft it will work fine. Very hard or heavily chlorinated water can leave mineral deposits on roots and leaves over time.
Humidity and air circulation
Orchids appreciate humidity levels of 40 to 70 percent, which is higher than most homes provide, especially during winter when heating dries the air. You can raise humidity by grouping plants together, placing pots on trays filled with pebbles and water (keeping the pot base above the waterline), or running a room humidifier nearby.
Good air movement is just as important as humidity. In their natural habitat, orchids receive constant gentle breezes. Stagnant, humid air promotes fungal and bacterial infections. A small fan on a low setting, positioned so it doesn't blow directly on the plants, provides enough circulation to keep foliage dry and healthy.
Temperature
Most popular indoor orchids are classified as warm-growing and do well in the temperature range of a typical home. Daytime temperatures of 21 to 29°C (70 to 85°F) and nighttime temperatures of 16 to 21°C (60 to 70°F) suit Phalaenopsis, Dendrobiums, and Oncidiums well.
The nighttime temperature drop is more than just tolerated; it's actually beneficial. A difference of about 5 to 8°C (10 to 15°F) between day and night is one of the most reliable triggers for flower spike initiation, particularly in Phalaenopsis. If your orchid is growing well but refuses to bloom, try placing it somewhere that gets naturally cooler at night for a few weeks in autumn, such as near a window (without cold drafts).
Avoid temperatures below about 13°C (55°F) for warm-growing types. Cymbidiums are the notable exception, actually requiring cool nights of 7 to 13°C (45 to 55°F) in winter to set flower buds. Keep all orchids away from heating vents, radiators, and cold drafts from doors or windows.
Fertilizing
Orchids are light feeders compared to most houseplants. The classic advice is "weakly, weekly," meaning a dilute fertilizer applied frequently during the growing season rather than occasional heavy doses. Use a balanced water-soluble fertilizer (10-10-10 or 20-20-20) diluted to one quarter or one half strength and apply it every one to two weeks during active growth (spring through early autumn).
Reduce feeding to once a month or stop entirely during winter when growth slows and light levels drop. Over-fertilizing causes salt buildup in the medium, which burns root tips and can show as brown leaf tips or edges. Every fourth or fifth watering, skip the fertilizer and flush the pot with plain water to wash out accumulated salts.
Some growers switch to a bloom-booster formula (higher phosphorus, like 10-30-20) in late summer to encourage spike production, though research from Michigan State University suggests a balanced formula works just as well for most home growers.
Repotting
Orchid potting media breaks down over time. Bark chips decompose, compressing into a soggy mass that holds too much moisture and suffocates roots. Most orchids need repotting every one to two years, regardless of whether they've outgrown their pot.
The best time to repot is right after flowering, when the plant is entering its growth phase. Signs that it's time include: medium that looks like mulch instead of chunky bark, roots that are mostly brown or mushy rather than firm, water that drains sluggishly, or roots climbing aggressively out of the pot in search of air.
To repot, gently remove the plant from its old pot and shake or rinse away the old medium. Trim any dead or rotting roots (they'll be brown, hollow, or mushy) with sterilized scissors. Choose a new pot that's only slightly larger, about 2.5 cm (1 inch) wider than the root mass. Orchids prefer to be snug. Place the plant in the centre, fill around the roots with fresh medium, and tap the pot gently to settle the mix without compacting it. Wait a few days before watering to let any cut roots begin to heal.
How to encourage reblooming
Getting a Phalaenopsis to bloom again is the question every new orchid grower eventually asks. The good news is that healthy moth orchids can rebloom reliably once or twice a year with the right care.
After the last flower drops, examine the flower spike. If it's still green and firm, you have two options. The first is to cut the spike about 1 to 2 cm (about half an inch) above the second node from the base. Nodes are the small, triangular bumps spaced along the spike. This approach sometimes produces a side branch that flowers again within 8 to 12 weeks, though the blooms tend to be smaller and fewer than the original display. The second option is to cut the entire spike down to the base, which lets the plant channel all its energy into new root and leaf growth before producing a completely fresh spike with larger flowers. Many experienced growers prefer this method for stronger long-term results.
If the spike has turned yellow or brown, it won't rebloom, so cut it off at the base.
To trigger a new spike, the plant needs a period of cooler nighttime temperatures. In autumn, place the orchid somewhere it will experience nights around 16°C (60°F) for three to four weeks. Combine this with bright indirect light and reduced watering, and most healthy Phalaenopsis will initiate a new spike within a couple of months. Once the spike appears (it looks like a small, pointed "mitten" emerging from between the leaves), return the plant to its normal growing spot and resume regular care. Stake the spike loosely as it grows to support the weight of future flowers.
For other orchid genera, the reblooming approach varies. Dendrobiums often rebloom from existing canes without intervention. Cattleyas and Oncidiums bloom from new growth, so focus on keeping the plant healthy and well-lit to encourage strong new pseudobulbs.
Common pests and diseases
Orchids are relatively trouble-free indoors, but a few problems crop up regularly. Mealybugs appear as cottony white clusters in leaf axils and along flower spikes. Scale insects look like small brown bumps on leaves and stems. Both can be controlled by wiping affected areas with a cotton swab dipped in rubbing alcohol, or by spraying with insecticidal soap or neem oil for heavier infestations.
Fungus gnats sometimes appear when the medium stays too wet. They're mostly a nuisance to people rather than a threat to the plant, but their larvae can nibble at roots. Letting the medium dry out more between waterings usually solves the problem.
Crown rot and root rot are the most serious diseases, both caused by excess moisture. Crown rot starts when water sits in the centre of the leaf rosette, turning the growing point brown and mushy. Root rot develops in waterlogged medium. Prevention is straightforward: water in the morning, ensure good drainage and airflow, and never let pots sit in water. If you catch root rot early, unpot the orchid, trim all damaged roots, dust the cuts with cinnamon (a natural fungicide), and repot in fresh, dry medium.
Fungal or bacterial leaf spots occasionally appear as dark, water-soaked patches on leaves. Improving air circulation, reducing humidity slightly, and avoiding water on foliage usually prevent these. Remove badly affected leaves with sterilized tools.
Troubleshooting common problems
- No flowers is almost always a light issue. Move the orchid closer to a bright window, or supplement with a grow light. Also check that the plant is getting a nighttime temperature drop of at least 5°C (10°F), and that you're fertilizing lightly during the growing season.
- Wrinkled or limp leaves on an orchid that's being watered regularly usually indicate root damage rather than underwatering. Unpot the plant and check the roots. If most are brown and mushy, trim the dead tissue, repot in fresh medium, and adjust your watering schedule.
- Yellow leaves can mean several things. If the lowest, oldest leaf yellows and drops while the rest of the plant looks healthy, that's normal. If multiple leaves yellow, suspect overwatering, too much direct sun, or a sudden temperature change.
- Brown or mushy roots are a sign of overwatering or decomposed medium. Repot immediately, removing all dead root material, and switch to a coarser mix or a smaller pot that dries out faster.
- Buds dropping before opening (bud blast) typically results from a sudden environmental change, such as moving the plant, temperature fluctuations, dry air, or exposure to ethylene gas from ripening fruit nearby. Once buds drop, they won't return on that spike, but the plant should bloom normally next cycle if conditions stabilize.
Conclusion
Orchids are far more forgiving than their exotic appearance suggests. The key principles are simple: give them bright indirect light, water thoroughly then let them dry, use a coarse, well-drained medium instead of soil, feed lightly during the growing season, and provide a nighttime temperature drop to trigger blooming. Once you've kept one Phalaenopsis alive and coaxed it into a second bloom, you'll likely find yourself eyeing the Oncidiums and Cattleyas before long.
References
- University of Tennessee Institute of Agriculture. (2023). Growing orchids in the home. UTIA Publication PB1634.
- Cornell University Cooperative Extension. (2021). Orchids as houseplants. Warren County Master Gardener Articles.
- NC State University Cooperative Extension. (2025). Graceful and glorious: a beginner's guide to orchids. Beaufort County Extension.
- Iowa State University Extension. (2021). Yard and garden: growing orchids at home. ISU Extension News.
- Michigan State University Extension. (2013). Growing orchids for beginners. MSU Extension.
- University of Maryland Extension. (n.d.). Care of Phalaenopsis orchids (moth orchids). UMD Extension.
- University of Connecticut Home & Garden Education Center. (2024). A beginner's guide to orchids. UConn Extension.
- American Orchid Society. (n.d.). Principles of light. AOS.
- Royal Horticultural Society. (n.d.). Top tips for growing orchids at home. RHS.


")
