Solarization: A Comprehensive Guide to an Eco-Friendly Soil Treatment
What is solarization?
Solarization is a technique for soil treatment using white, transparent plastic and the sun’s heat. This technique is useful for reducing the disease pressure (soil-borne pathogens and pests) and the number of weeds (and weed reproductive material, e.g., seeds) and managing dangerous parasites like nematodes. This is the most effective way to treat soil to prevent diseases from spreading to plants while preserving the ecosystem and the helpful bacteria in the soil. Treating nursery soil or soil for potted plants is primarily beneficial.
Why treat the soil – Why is solarization beneficial?
- Plants live and grow in soil. Plants flourish better in a safer soil and environment.
- All living organisms are more vulnerable in their beginning stage. Thus, having a secure home is essential, especially for young plants/seedlings.
- Numerous disease-causing bacteria and parasites, such as nematodes, go from the soil to plants. Safe soil lowers these possibilities.
- Soil is a home of plants and various other living microbes. Living soil requires the protection of such organisms. Many of these advantageous bacteria are destroyed by the application of pesticides in the soil during chemical-based soil/nursery bed treatment.
- However, the solarization techniques we employ for treating the soil should be safe for people to use around plants and beneficial soil organisms.
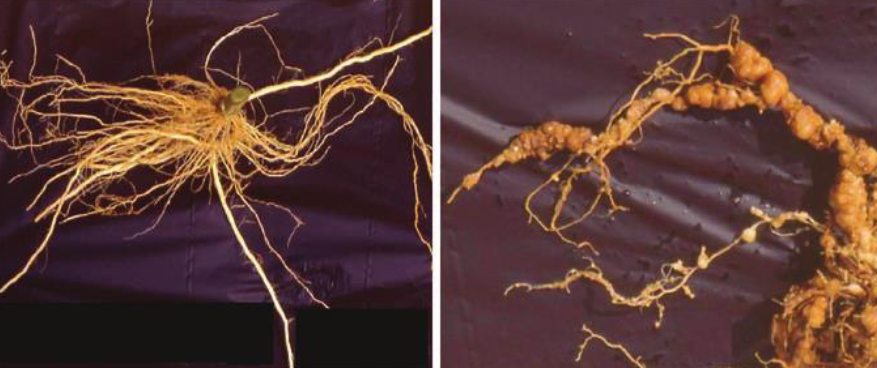
Photos 2 & 3: Solarization effect on nematode infection of vegetable roots
What materials and tools are required for applying polarization?
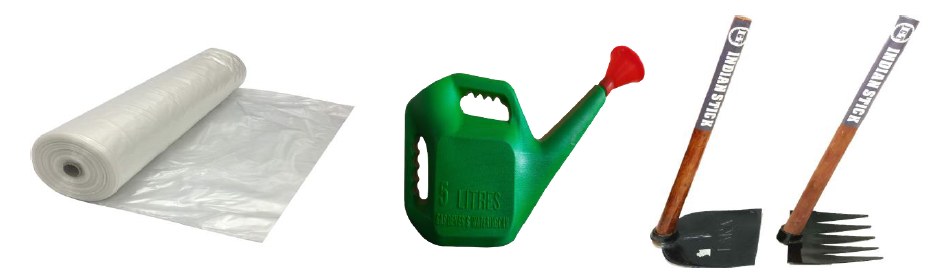
Photos 4, 5 & 6: Materials requires for Solarization
- Open sunny ground that allows heat and sunlight to penetrate the ground well.
- A transparent, white plastic seat (300 gauge or higher) for the nursery bed cover.
- Tools/equipment to prepare the soil.
- A Hazari (garden water cane) or bucket for irrigating the soil.
- If we want to mix organic manure or compost into the nursery beds, these kinds of manures (whether they will be raw or decomposed) will be used.
Procedures for solarization-based soil treatment
- Carefully plow or dig the soil before solarization.
- Green plants and weeds alike ought to blend into the soil.
- Incorporate composted manure or organic stuff into the soil (if necessary).
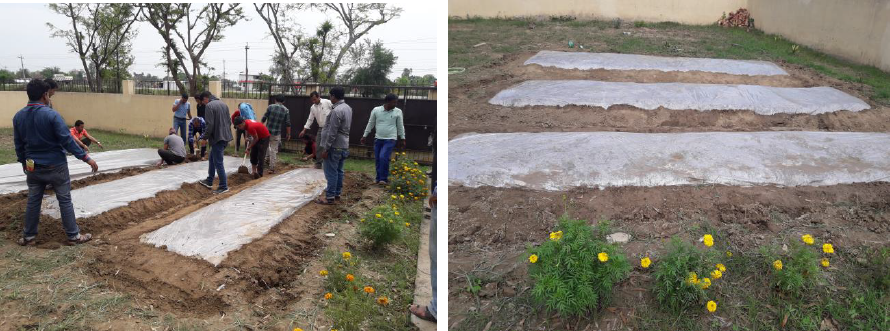
- Create nursery beds 10 to 15 cm high from the ground up, one meter wide, the necessary length, and level after adding organic matter or compost to the soil.
- Moist well or irrigate the bed soil that has been ready for polarization.
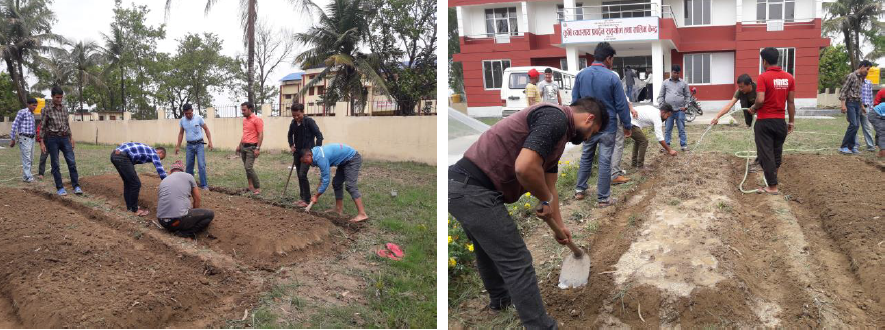
Photos 7 &8: Soil/nursery bed preparation for solarization
- Moist soil intensifies a more effective solarization process.
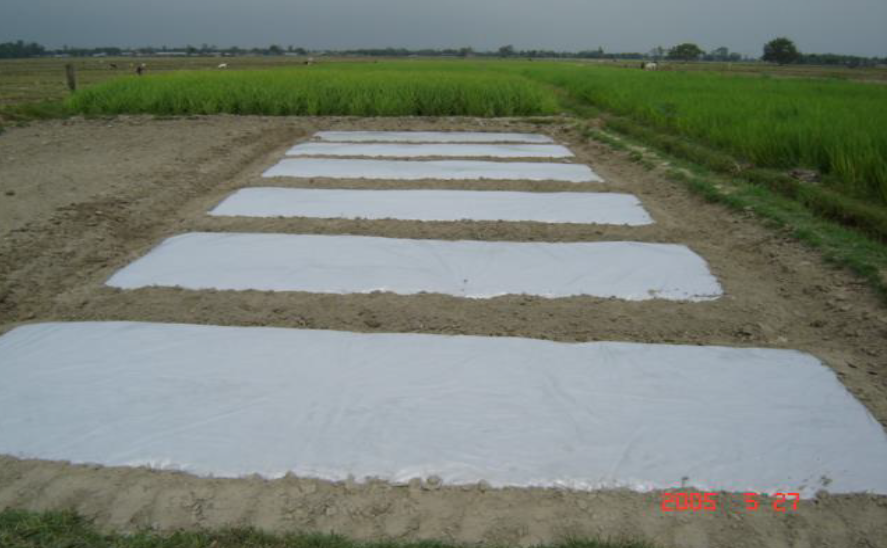
- A transparent, white plastic sheet should cover moist beds. To seal the beds with soil, leave 20 to 25 centimeters of plastic on the ground surrounding the beds while covering.
- Shield the plastic outside the beds with soil from all sides, as shown in the photo (Photos 9 & 10).
- Then, the plastic covering the beds, shielded with the soil surrounding it, fills with water vapor, as indicated in the picture, obscuring the soil inside.
- If the plastic covering the soil can have a hole in it, treated soil-covered plastic does not turn white.
- Hole closure requires locating them. Once all of these tasks are finished, the initial phase of solarization is completed.
Photos 9 & 10: After completion of solarization nursery beds
How long does it take to complete the solarization process?
- After carrying out the above-mentioned procedure and covering the soil, seeds of different weeds and grasses that exist inside the soil (weed seed bank) will begin to sprout and emerge inside the plastic cover within a week.
- The solarized nursery bed’s soil is gradually warming up each day.
- The grown plants eventually wilt due to the soil’s moisture and heat, and after 3–4 weeks (depending on season/climate) of having the beds covered with plastic, the plants die and turn dark brown or black.
Photos 11 & 12: Nursery beds condition after complete solarization process
- Our solarization process is finished when the solarized bed reaches this point.
- Following that, we can seed the nursery bed by removing the plastic covering it and allowing the soil to cool.
Plant growth and development in solarized soil
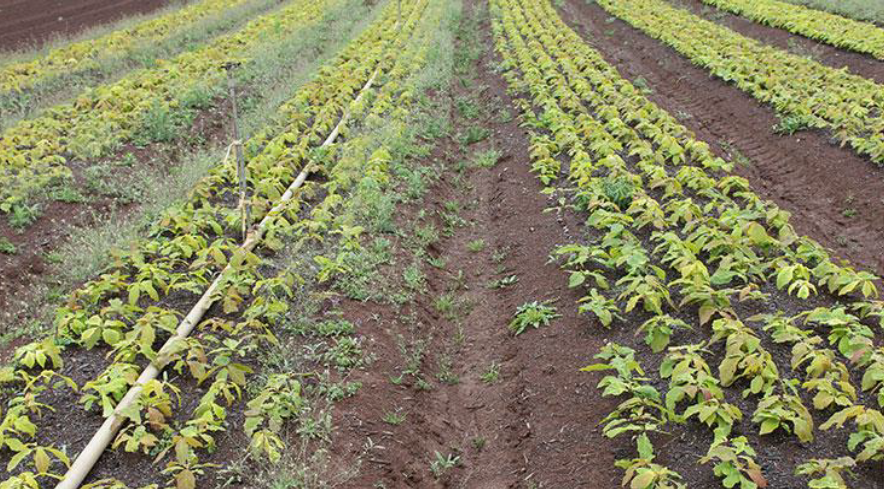
Photo 13: Plant condition and weed situation in control and solarized beds
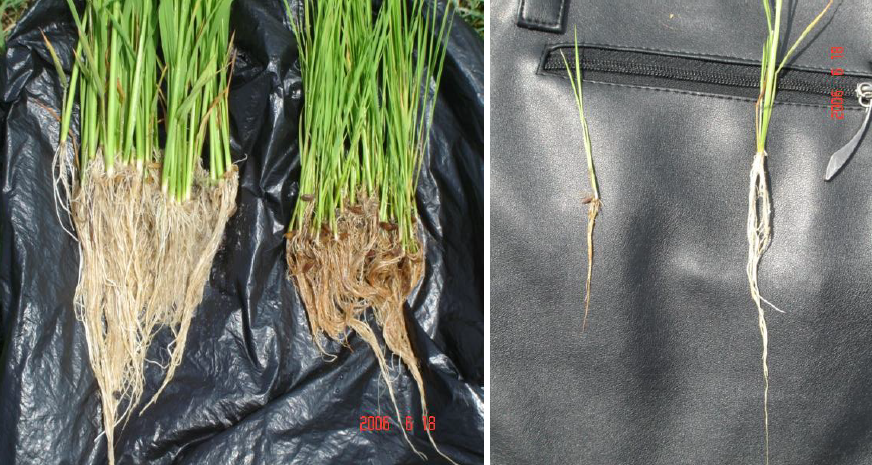
Photo 14: 11 days old solarized bed’s rice seedlings and 22 days old normal bed’s rice seedlings
Further reading
Plant Parasitic Nematodes: Species, Diagnosis and Control
Plant Parasitic Nematodes and Strategies for Crop Protection
Rice sustainable farming and SRI (System of Rice Intensification) method