

Coffee propagation by seeds (Part 1)
Coffee is a perennial plant, and its propagation is mainly done by seed, so producing high-quality coffee seedlings is essential to ensure that your plantation will be successful. Coffee seeds germinate quite slowly and can be further delayed for more than 30 days, depending on the climate and the variety. Taking this into consideration, you have two options when planting coffee. The first is to buy the seeds (propagation material) from a legitimate certified organization or a seller. In this case, the process is a bit faster, and the higher quality, variety purity (traceability), and health o the propagation material is guaranteed. Most coffee-producing countries have national coffee associations that may either sell you certified seeds or direct you to well-established plantations and coffee growers that also collect, process, and sell them.
If, however, you decide to collect the seeds yourself from your own farm, you should consider several criteria:
- Choose 4 to 8-year-old coffee plants that you have carefully observed for a few years. Note specifically which of these plants have consistent vegetative growth, healthy foliage, branches, stems, and properly formed roots. Also, make sure that they have had consistent production (yield) for several years. To ensure that production, quality, and future cup flavor will be uniform, mother plants should be from the same variety.
- You must wait until the cherries have reached 80% ripe; then, a selective picking by hand must be carefully done, making sure not to damage the branches. You are advised to select the branches that come out from the middle of the main stem and pick only the berries found in the middle of that branches. Make sure you separate the beans from each mother plant in different bags or containers.
- A further post-selection must be performed by submerging 100 of the picked coffee berries in water. If less than 5% floats, most of your seeds will turn into strong and healthy plants. If more than 5% floats, you should consider picking seeds from other plants.
- Once you have made sure (with the previous step) that 95% of the selective picking is optimal, you can submerge all the berries in water. This time, make sure you remove all the ones that float as those have defects that will not let them grow or will not generate a good quality plant.
Proceed to remove the berries’ pulp (mesocarp) and ensure that no more than six hours have passed since you picked them from the mother tree. This process, also known as depulping, consists of stripping the coffee bean from the red or yellow husk containing the seed.
- For this, you can use either a manual or a mechanical coffee pulper machine which must be calibrated beforehand to ensure that it won’t damage the seed. A seed that is cut or broken will have wounds that might serve as an entrance for diseases such as fungi.
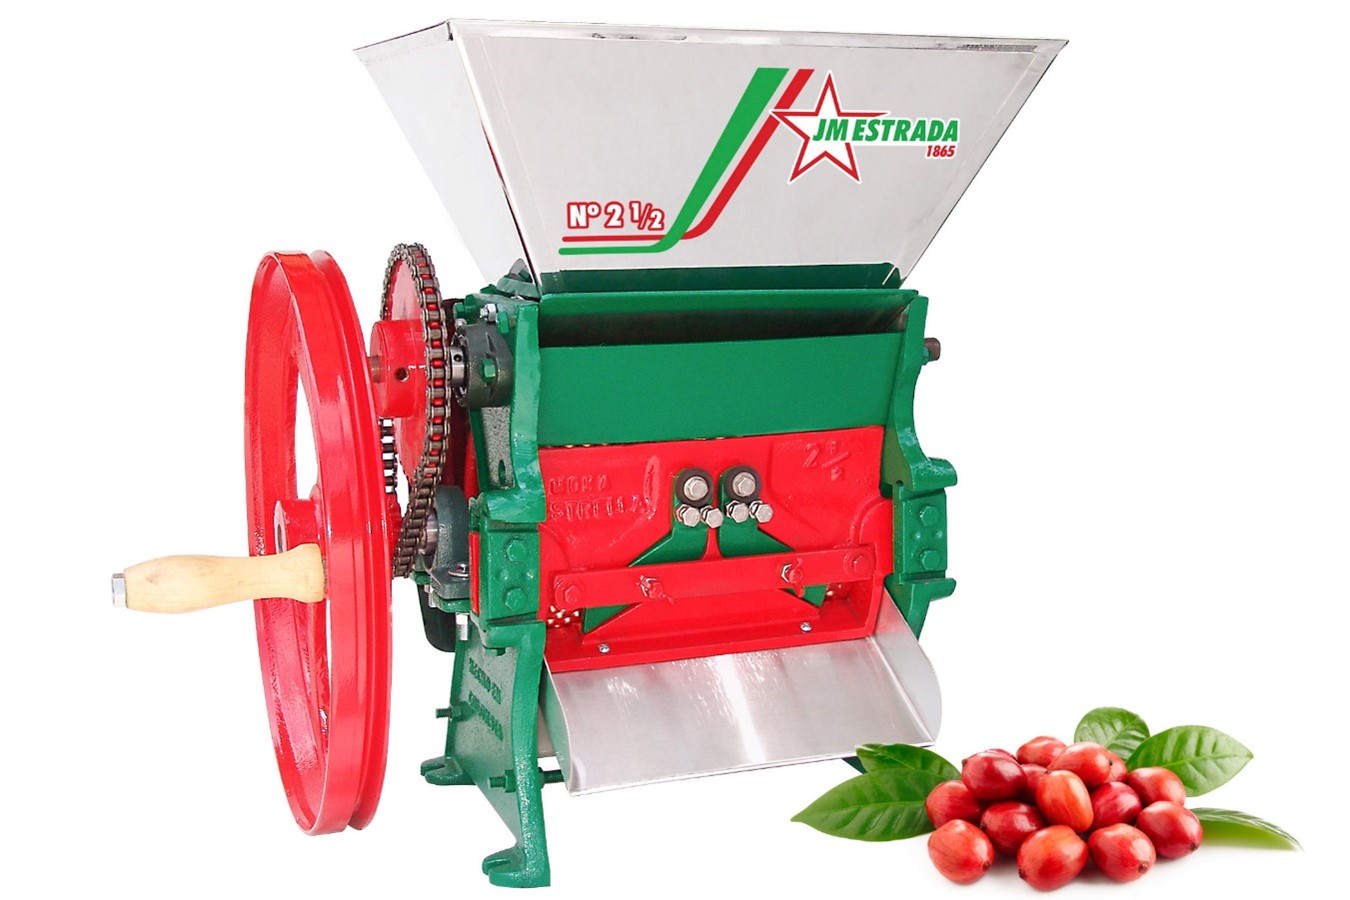
[1] Manual Coffee Pulper Machine.
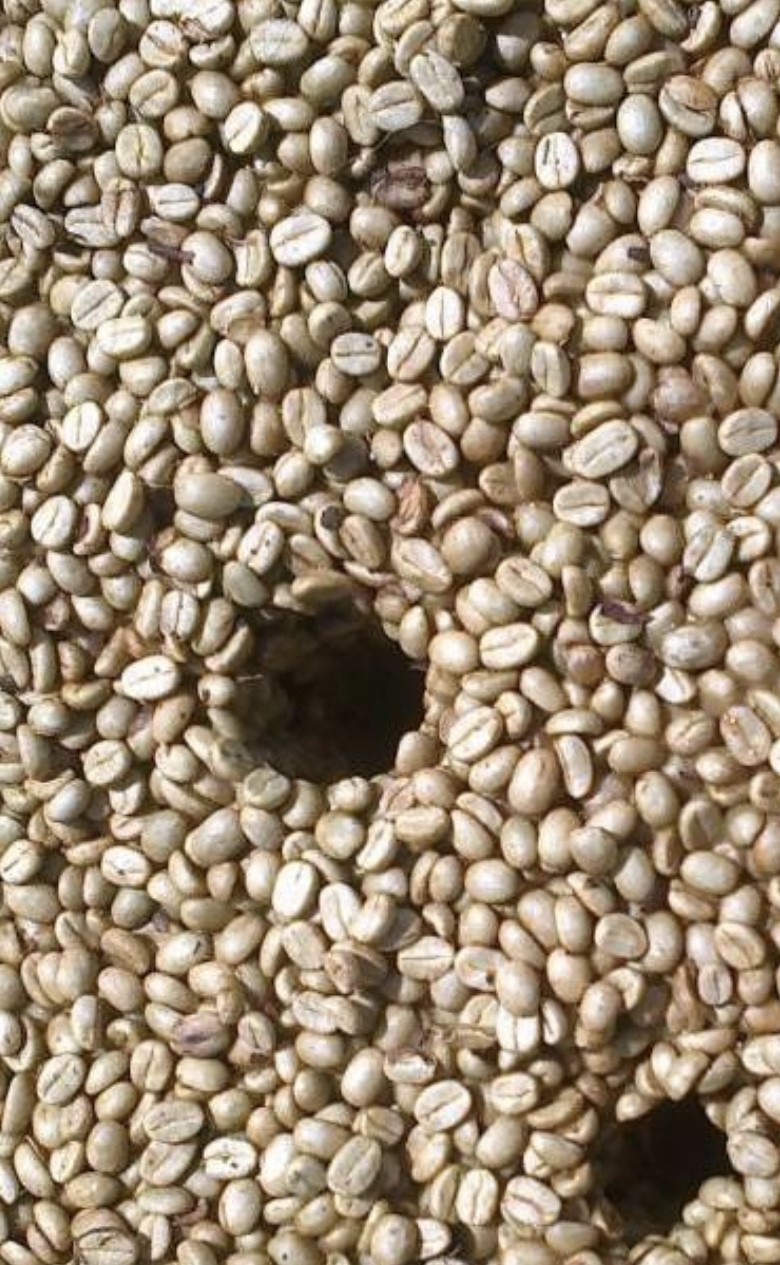
- Next comes the fermentation process, which can be done in a suitable (depending on the number of seeds) basin, tank, barrel, or container. However, having a pool designed specifically for this would be ideal. The purpose of this step is to remove the mucilage, which is a jelly-like material around the bean. For this, the beans should remain in the container for between 12 to 36 hours. The time frame that I mentioned might not seem precise; however, you must consider that different factors come into play at this point; location, temperature, climate, and chosen method for fermentation will determine how long this step will take. There are different ways to determine when the optimal fermentation level has been reached, but the most traditional way is an ancient method that my grandmother used to pioneer. It consists of inserting a solid object like a stick into the beans that have been left resting during the process. After that, you must take it out and observe the hole it has left. If the walls of the hole immediately close and if seeds come out and/or are attached to the stick, then you need to wait longer. However, if the walls of the hole remain without closing and no seeds come out, you have reached the ideal point of fermentation.
- The next step is to wash the seeds by adding clean water. It’s important to note that the container you have chosen for the fermentation process should have a drainage system that will allow the water to exit easily. If you are processing a small number of seeds in a bucket, this might not be an issue, but it is an essential factor when you are working with large amounts. You should constantly stir the seeds with a paddle or shovel. This will add friction by making them rub with each other, and this constant rubbing will eliminate the remaining residues of mucilage. Then the water should be drained, and the washing process should be repeated as many times as necessary. When you hear a rough sound clicking each time the beans crash with each other, the washing will be done. You can also try picking the beans from the container to do a final check, mucilage will make the beans slip from your hand, but if you can hold them with no difficulty, you will have a second indicator to move on to the next step.
The washed processing method for coffee consumption and the process of preparing coffee seeds for germination are both very similar up to this point. However, from here onwards, they slightly vary as they are meant for different ends.
- Drying the seeds comes immediately after having washed them. You can place them on cement patios or preferably in raised seedbeds with a sieve base. Make sure the bean is exposed to direct sunlight for a period of no longer than 30 minutes, and you should constantly stir the seeds during this period so that every end of each bean dries. Too much heat or exposure to sunlight might kill the seed embryo, and once this happens, you will not be able to grow a new plant. So right after this, provide some shadow for the cement patio or seedbed. For the next 7 to 15 days, the drying process should be continued without direct sunlight exposure. The seeds should be stirred at least 6 times a day; make sure they are evenly spread and avoid being piled in thick layers, as this won’t allow them to dry evenly. After washing, the seeds have a 50% moisture level; by the end of this step, their moisture level should be at 30%.
By this point, the beans have acquired a different state, and they are called coffee parchment (endocarp), for they still have a final yellow layer surrounding the seed (endosperm). It is essential to leave this layer on as it will provide extra protection for the grain once it is stored.
- Before storing the seed, another selection filter must be done. You should check for any seeds with imperfections. Make sure most seeds have the same shape, size, and color. If you find seeds that are quite small compared to the rest, you should take them out; If you find seeds that are broken, hollow, dark, unevenly shaped, or drilled by Coffee Berry Borer, you should discard them.
- Finally, you may store the seeds in up to 11 to 25 kg (24-55 lbs) sacks. Avoid using any container with a bigger capacity as that will not allow the seeds to keep a 25 to 30% moisture level, and keeping them on that weight capacity will also make it easier to move them around. Jute sacks are ideal as they have pores that allow air to come in and out, avoiding exudation from the beans. Never leave the sacks in direct contact with the floor. It is advisable to pile them on pallet-like platforms that will allow air to flow from underneath. Make sure to check the sacks once a week by opening them and stirring the seed to avoid any fungi or mold from appearing.
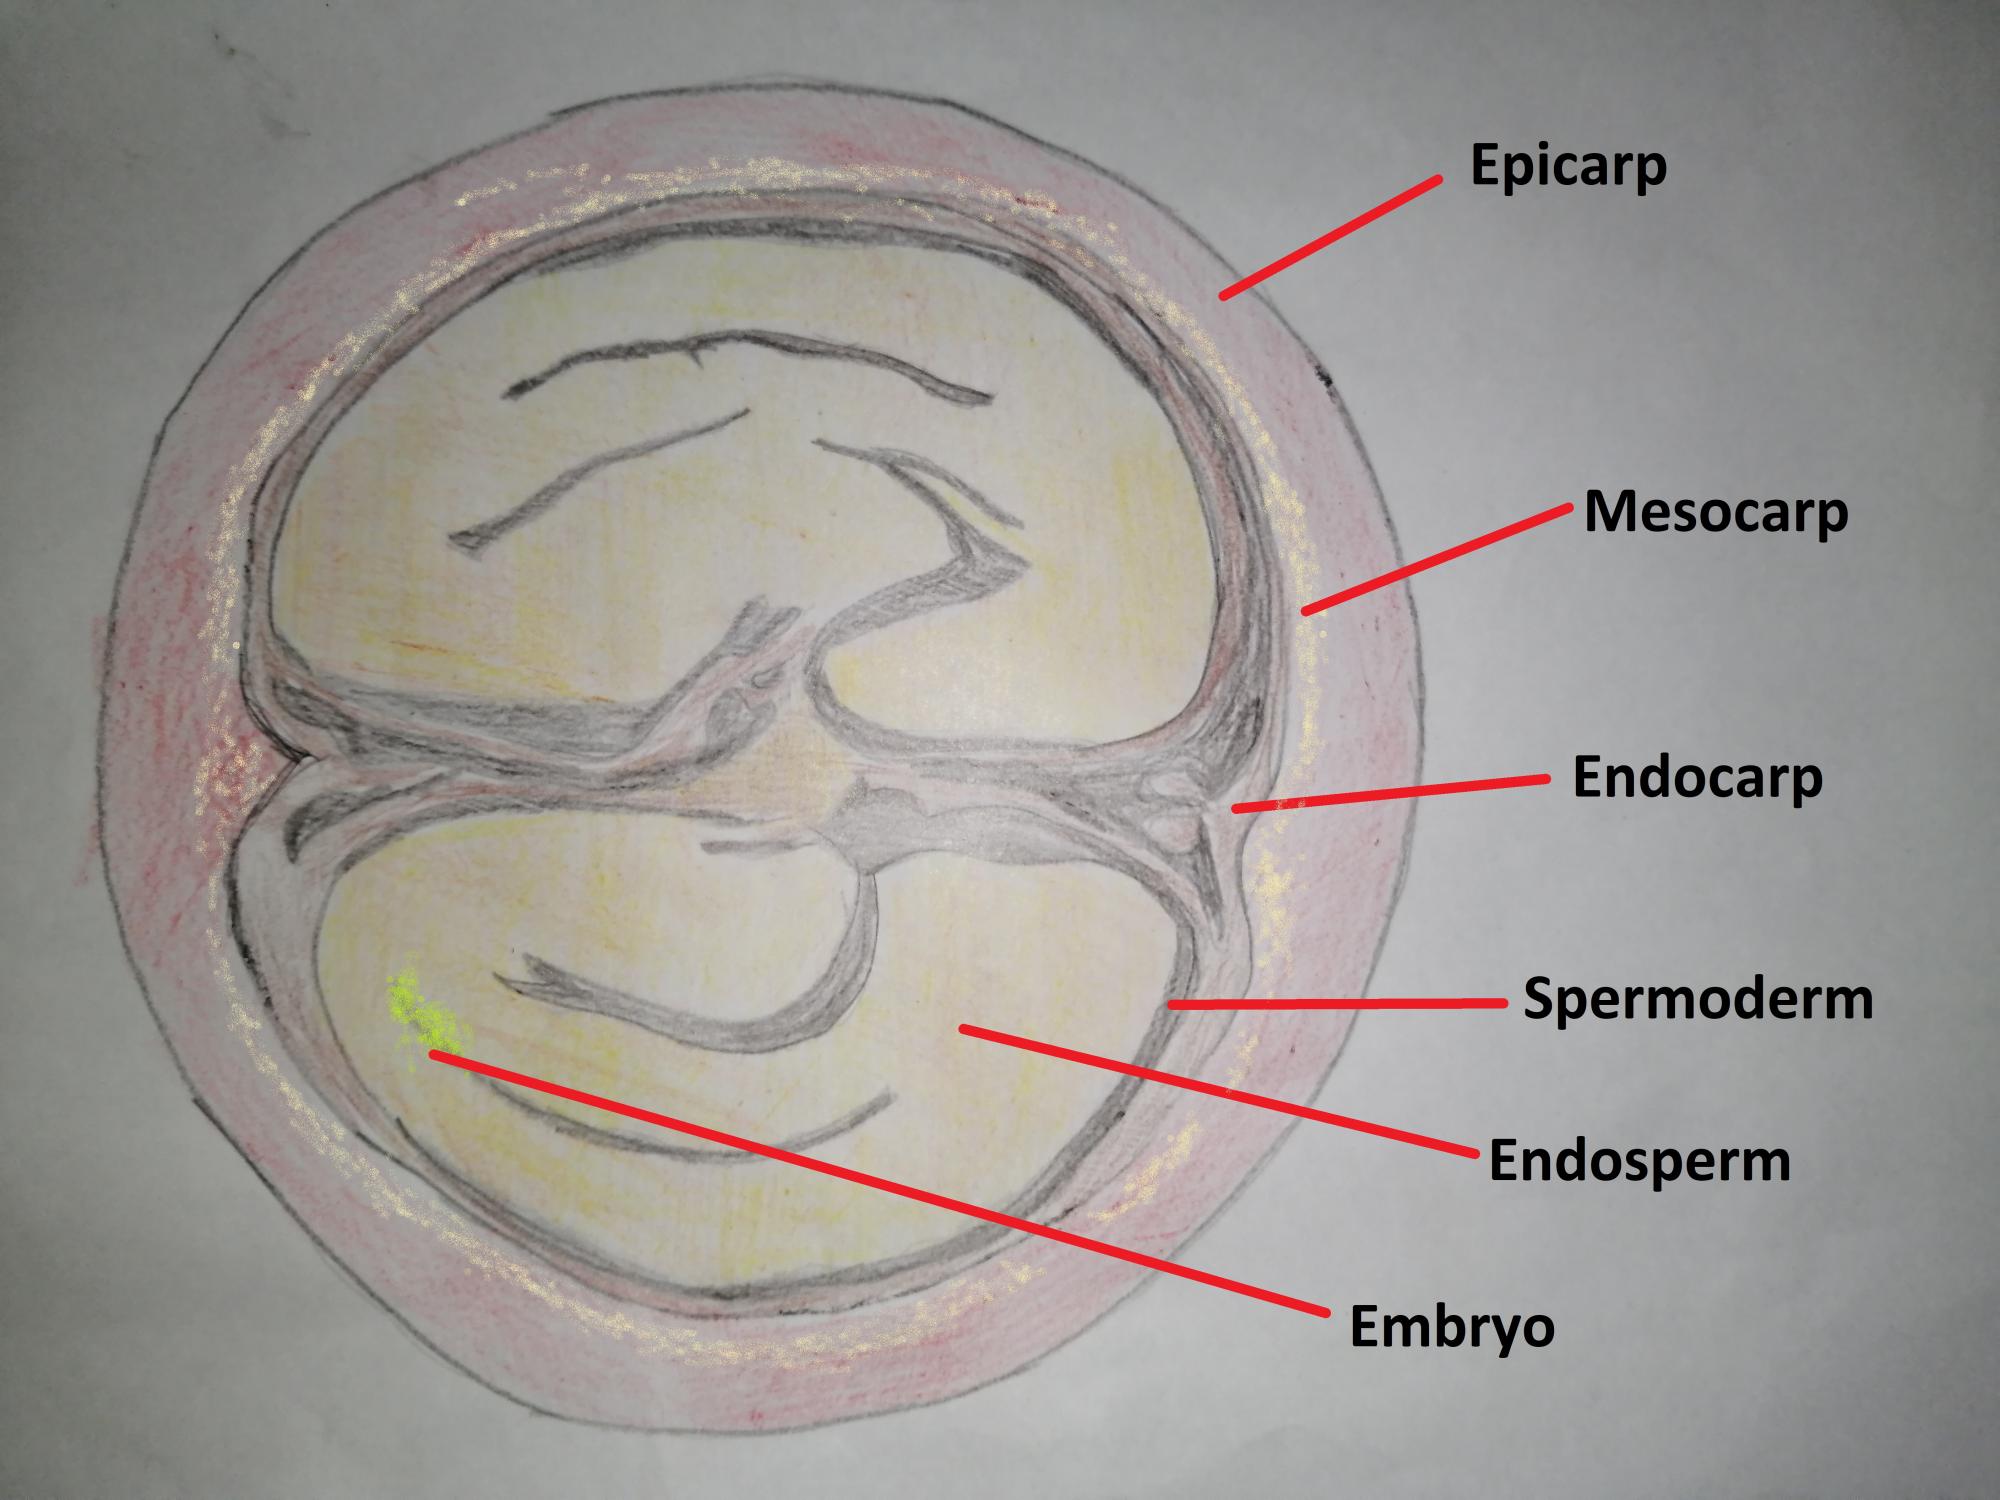
Anatomy of a coffee bean
As you can see, the criteria that must be followed should be rigorous, and much care must be taken. Bear in mind that this is just the first part of the process before going into the actual germination stages; the seed can be stored for up to three months. However, if you keep it longer, its capability for germination will drastically decrease. So, plan and have a calendar with set dates to avoid storing them for longer than necessary.
After processing, 5 kilograms (11 pounds) of ripe berries transform into 1 kilogram (2.2) of seeds, equaling between 2200 to 3000 seeds, depending on the variety’s unique traits, such as bean size. Knowing this and the characteristics of the area you need to plant, you can estimate how many kilograms of seed you need to collect and process before starting your coffee nurseries.
References
[1] Image source https://www.jmestrada.com/tienda/cafe/despulpadoras/despulpadora-no-2%C2%BD/
-Guía técnica para la elaboración de viveros de café, ANACAFÉ 2022, Eder Gonzalez Arias. https://www.anacafe.org/manuales/guia-de-viveros/
-Semilleros y viveros de café, USDA & TechnoServe 2015. www.mocca.org
-Manual para la producción de semilla certificada en México, by Grupo Técnico Interdisciplinario de Café, SAGARPA
Coffee Plant Information – Morphology
Coffee Genetics and Variety Selection
How to Select, and Treat Coffee Seeds
Germination of Coffee Seeds and Creation of Seedbeds for Planting
Coffee Trees Planting and Plant Spacing
How to Prune your Coffee Trees in an Agroforestry System
Shade-Grown Coffee in an Agroforestry System
Coffee Tree Flowering and Pollination
From Rainwater Harvesting to Irrigation of Coffee Trees
Coffee Tree Fertilization Requirements
Weed Management in a Coffee Plantation


