Germination of Coffee Seeds and Creation of Seedbeds for Planting

This post is also available in:
This post is also available in:
![]() Français (French)
Français (French) ![]() العربية (Arabic)
العربية (Arabic)
Selection of seeds, germination, and creation of coffee seedbed (Part 2)
How to create your own coffee plant nursery
As we previously mentioned, the germination of a coffee seed is slow, and sometimes it is crucial to save some time; just as you are able to speed up the process by buying a seed that is ready to be germinated, you can also skip this step by buying a coffee plant that is ready to be planted in your farm. In fact, within the extensive chain of jobs in the coffee industry, there are farmers and producers that only make their income by selling coffee plants to other farmers. However, the time, care, and attention that goes into this process can be overwhelming. As a medium-scale coffee producer, I either germinate my own seeds or buy coffee seedlings according to my needs. Back at the start of 2018, I had to eliminate about 90% of my coffee plantation as most of the trees were either old or infested with the coffee leaf rust epidemic that had been massively affecting coffee plantations in Latin America and the Caribbean since 2012. Replacing almost a whole plantation with bought seedlings can be expensive, so the best choice I had was to create my own nurseries. Today my plantation has been renovated, but I still need to plant some more trees that either didn’t make it earlier or that are too old and in the last stages of their production cycle. The number of trees I need to plant now is significantly smaller than the one I needed back in 2018, so this time it is better to buy the seedlings; of course, as mentioned before, I still need to make sure that any seedlings I buy come from fully certified seeds.
Once you have your seeds, the step that comes right after is the preparation of the seedbeds and coffee nurseries.
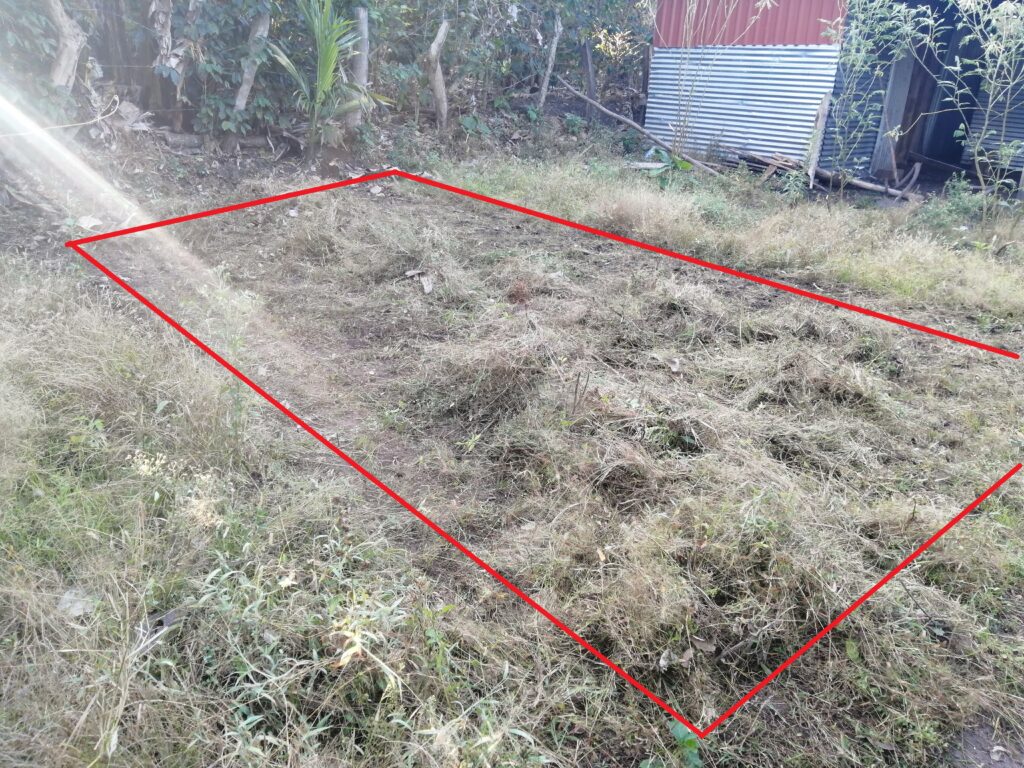
Choose an area big enough to fit all the plants. The terrain should be flat, with enough sunlight, and it must be located at a place with access to water. Constant irrigation is a must during this stage, but you also need to make sure that water may drain without accumulation (avoid water logging). Too much moisture will allow mold to develop.
Make sure you clear the area where you will be working. Eliminate any grass or weeds. This way, you will ensure that the soil’s resources will be only devoted to the seeds.
 To prepare the soil, use white or river sand with no organic materials, but make sure to sift it to alienate any objects that might serve as an obstacle to the development of the seeds.
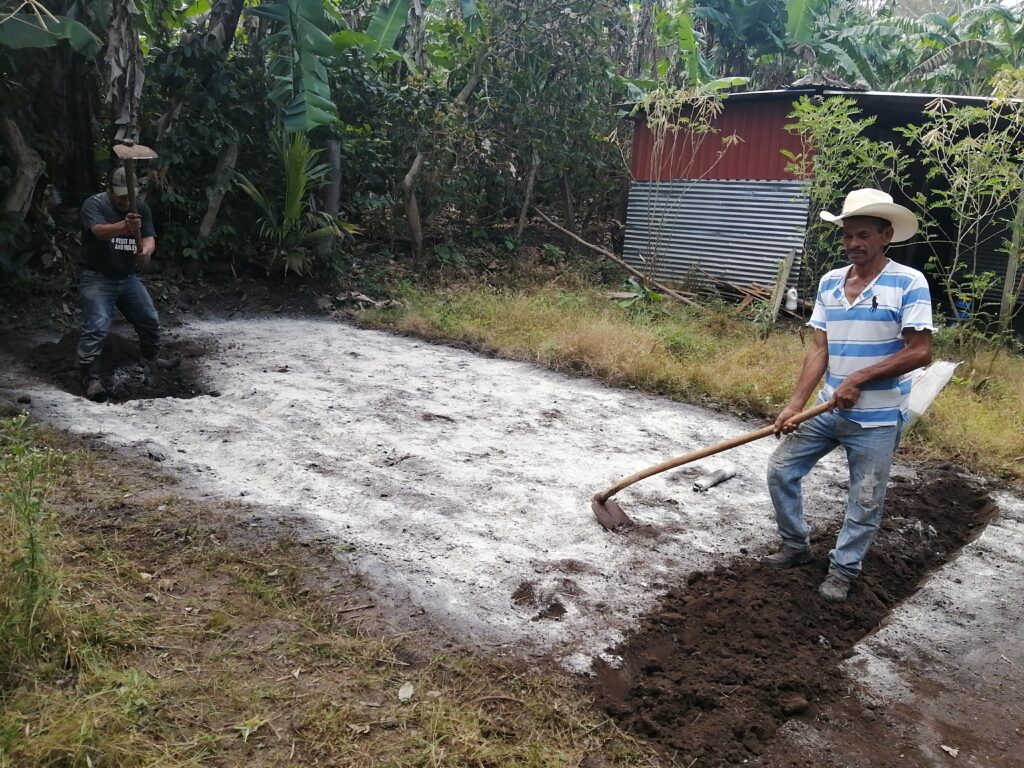
Soil preparation at Finca San Gerónimo, Nuevo Oriente, Moyuta, Guatemala.
Create seedbed boxes with a 20 cm depth. Their length will depend on the number of seeds that you intend to sow. At the same time, you should ensure that you can reach every point of the box. So, I recommend making them 1 m wide and 1.20 to 2 m long. You can use blocks to build the walls of the box. However, if you do not intend to germinate seeds every year, a more temporary solution is best, such as using bamboo or tree bark.
Seedbed at Finca San Gerónimo, Nuevo Oriente, Moyuta, Guatemala
Disinfect the substrate. My grandparents used boiling water for this. It’s a traditional method that is still used nowadays, and it can be quite effective for killing all kinds of pathogens, as well as weed seeds and insects. However, you should keep in mind that boiled water doesn’t remain boiled as you pour it, so this inconsistency in the temperature might not disinfect all the soil evenly.
Soil sterilization by solarization is also effective and eco-friendly. For this method, you should water the soil until it is moist. Then, it should be completely covered with a clear polyethylene film (make sure it’s not white or black, as these colors will block the heat from the sun). Then bury the edges under the soil around the seedbed. That way, it will not only be set but also trap the incoming heat. Even though this method eliminates pathogens and pests, it has the advantage that it does not harm any microorganisms that are beneficial for plant growth. The only con is that the plastic film must be left for about 4 weeks before inserting the seed. In contrast, the boiled water method can be done a day before you start.
Other widely used methods require chemical formulas that, even though they are quite effective, might vary according to your country’s regulations and available brands. You’ll likely have to use at least two different products, one for soil fungus and another for insects and nematodes.
Before planting the actual seeds, let me remind you that their germination will be slow, so you need to plan ahead; climate and the seasons will be two important factors that will determine your agricultural calendar. Guatemala, for example, has only two seasons: summer and winter, or rather six months with a dry season (November to April) and six months with a rainy season (May to October). As a farmer here, this detail is important as it will determine when my crop will be ready and marks specific months ideal for planting. Since the coffee nurseries will require constant irrigation (controlled by us), it is best to only plant the already-developed seedlings (at their final location). When the rains arrive while the dry season is best for the germination stage because, at this point, the seeds and the young seedlings are susceptible to diseases by moisture; it is best to have them under an abundant but controlled watering process.
In addition, we need to remember that young trees will not be ready to be planted until 6 to 8 months after their germination. In my case, I created my seedbeds in late October of 2018 and planted the developed coffee seedlings on the plantation during July 2019 when the rainy season was at its strongest point.
There are 3 main ways in which you can insert the seeds into the germinator seedbed:
- Furrow seeding: this involves creating long narrow trenches. Make sure you place the seeds one after another without piling them. Furrows should have a 10 cm distance from each other. This technique is effective when you are working with limited amounts of seeds.
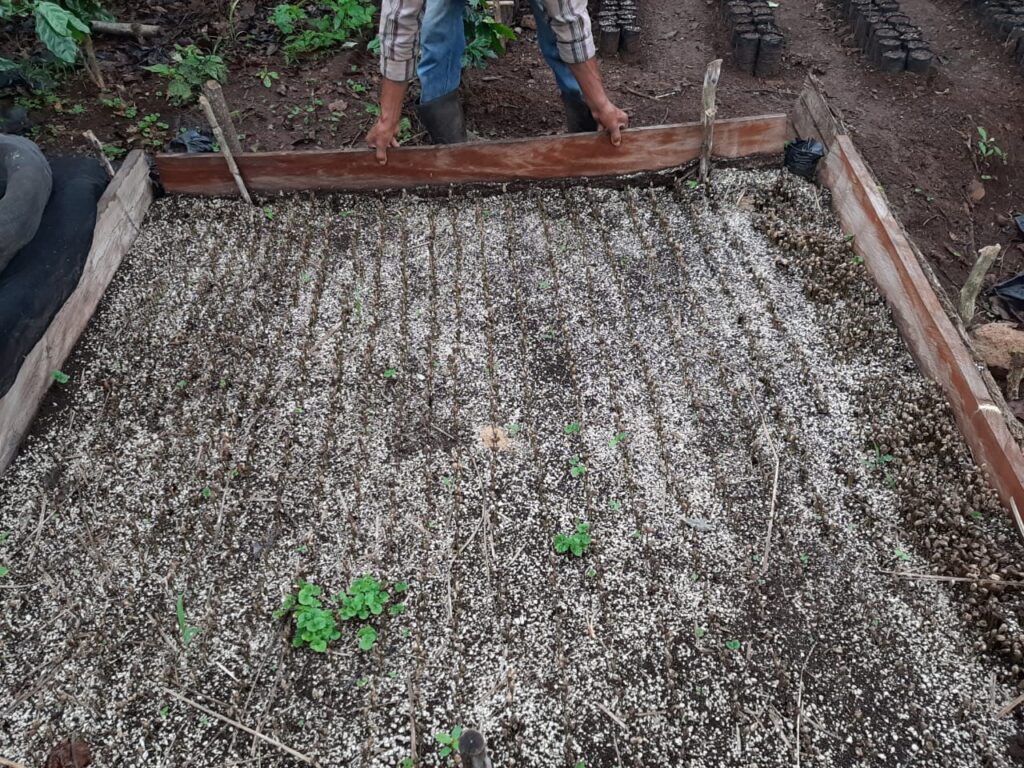
- Band seeding: here, you also create furrows, but they are wider so that you can accommodate more material. They should be 10 cm wide and have a 5 cm distance from each other. Make sure you keep an amount of 10 oz of seeds per square meter. Seeds should be scattered through the bands, but they must not be piled on each other.
- Broadcast seeding: as with the previous technique, this is useful when you are dealing with large quantities. Seeds should be scattered all through the seedbed making sure you do not exceed the amount of 1lb per square meter.
In all the above cases, you should ensure that the seeds are placed no deeper than 1 cm into the soil.

Band seeding at Finca San Gerónimo, Nuevo Oriente, Moyuta, Guatemala.
It is important to control the moisture and temperature of the nursery, so it needs to be covered to complete this process. The type of cover will depend on the materials you have at your disposal. Straws and other organic materials are quite useful. The cover should be placed as a lid, but once the plants come out, it should be lifted, allowing a 1m distance between the soil and the cover. At this point, you can change into a netting system.
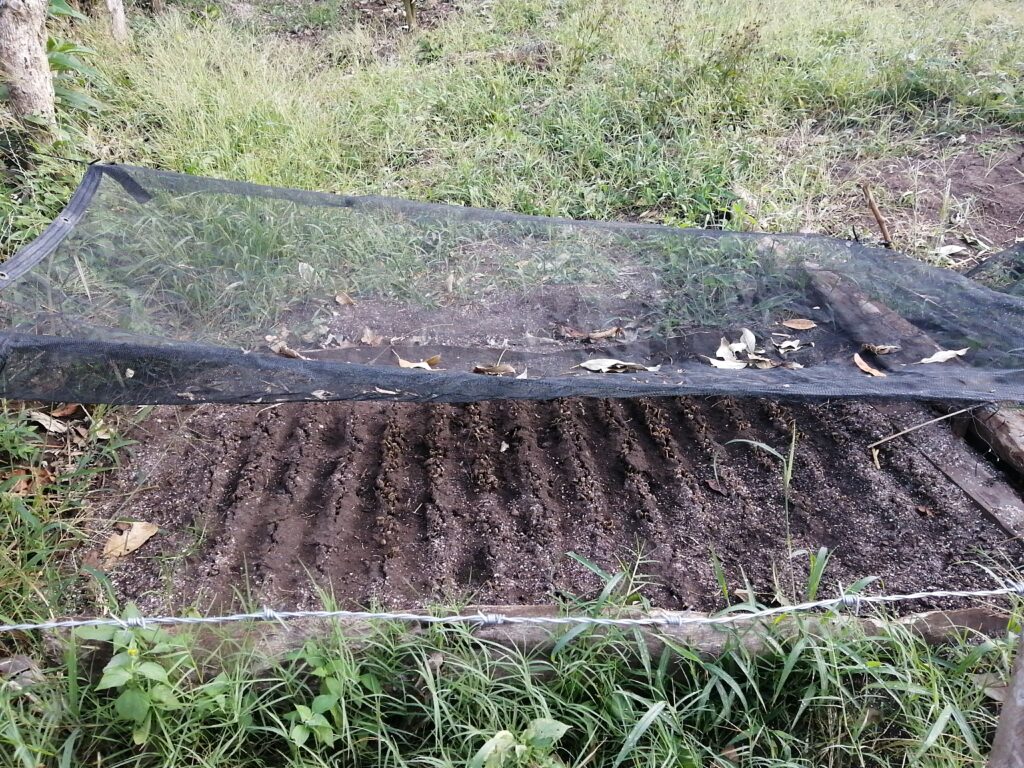
Coffee Seedbed Cover
Between 30 to 50 days after inserting them, the seedling will begin to come out. At the beginning of this process, the seedlings are not entirely straight and have staple-like positions.
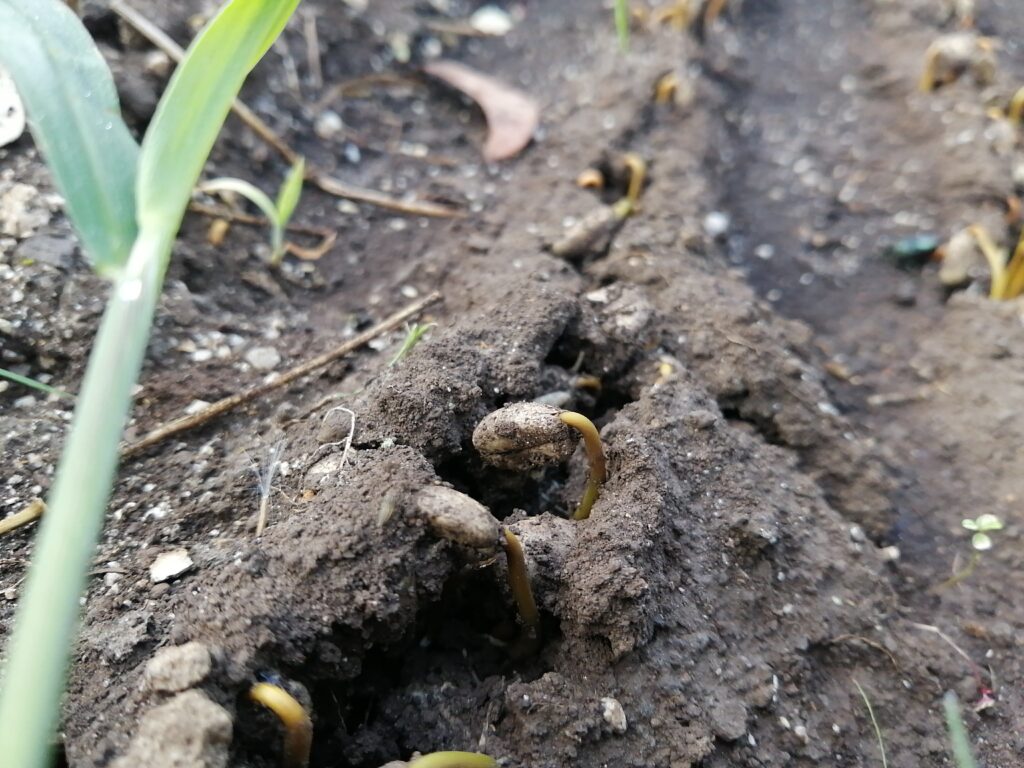
Sprouting coffee seeds emerging from the soil
Coffee seedling in staple-like position
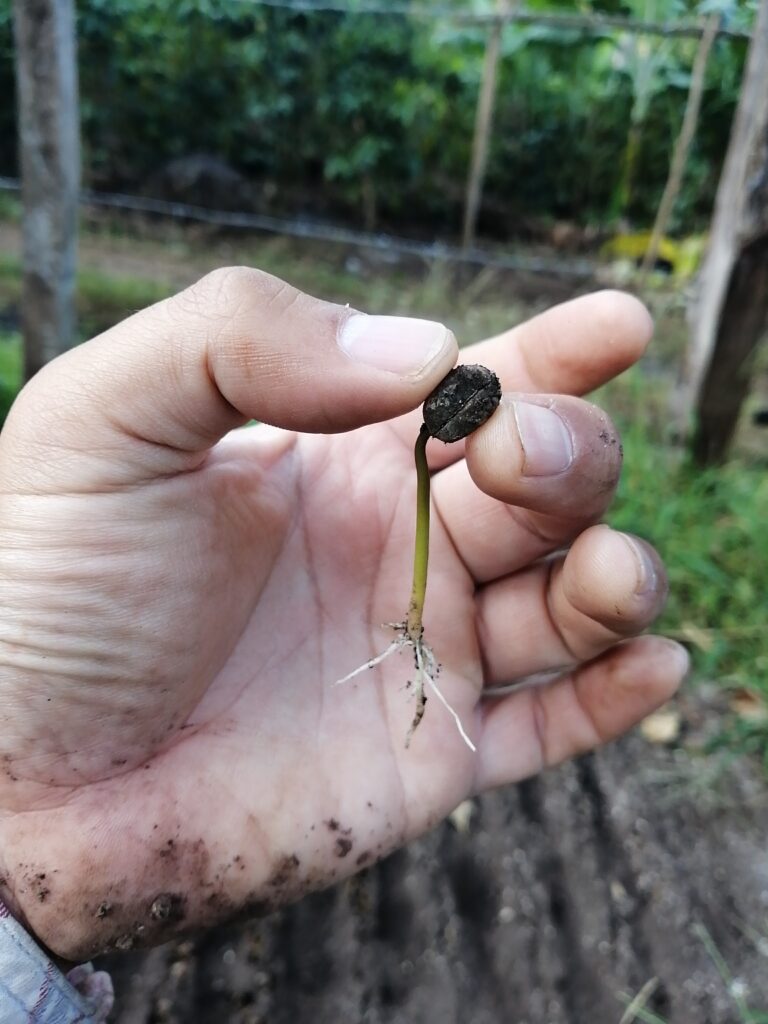
Not long after this, they become straight, and they achieve a stage that is commonly known in Guatemala as soldadito (little soldier). At this point, we can appreciate the importance of the soil being properly sifted; since no obstacles exist, the seedling’s roots begin to develop and expand, and here the vertical and main root begins to acquire their form.
Coffee seedling in the “little soldier stage.”
Once the Little Soldier stage is achieved, our young coffee plant is ready to be placed in seedling bags. There are different types of bags, but the most used have a 17-20cm length, 12cm diameter, and 3 mils thick.
Transplanting is a delicate process, and five important details need to be taken into consideration:
- In most cases, the Little Soldier’s root will have almost the same length as the container bag. If you plant it like that, the root will hit the ground very soon and will not continue to grow vertically. If the root coils, the tree will never fully develop. To avoid this, 1/3 of the root must be cut or pruned; this will allow it to continue to grow vertically and downward during the following months.
- The soil used for the bags should be a sandy loam substrate with organic matter. This will allow the plant to absorb the needed nutrients as well as allow natural drainage of any excess water.
- Plants should be watered 3 times a day. Installing an irrigation system is essential, and even though this will facilitate this task, it is also important that you complete the watering process by manually hosing any corners that the sprinkler heads might not reach in your system.
- Once the bag is filled with the substrate, you should make a deep hole with a stick, then proceed to insert the seedling, but as you fill the hole with the soil, you must make sure to pull up the Little Soldier gently. This pulling ensures that the root will be buried long and stretched. Not doing this will also provoke it into the coil.
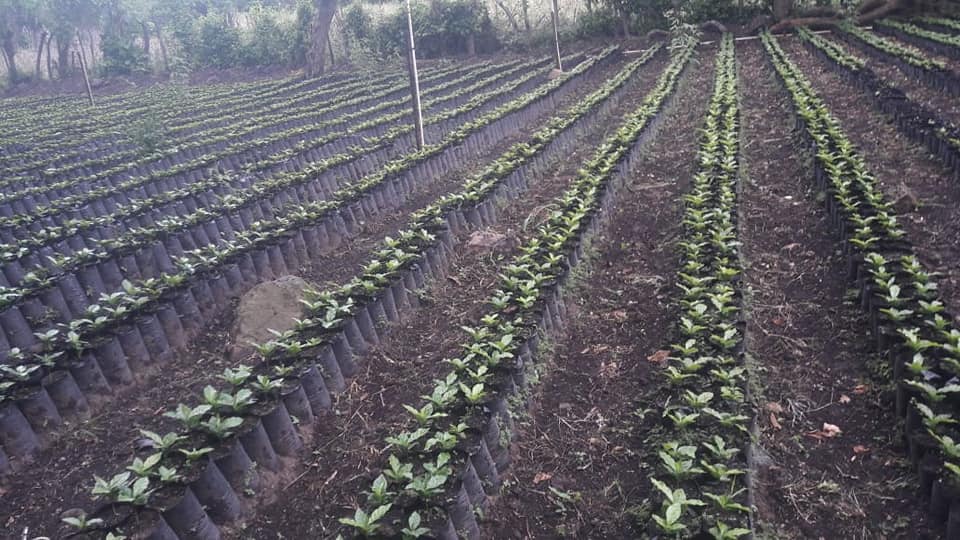
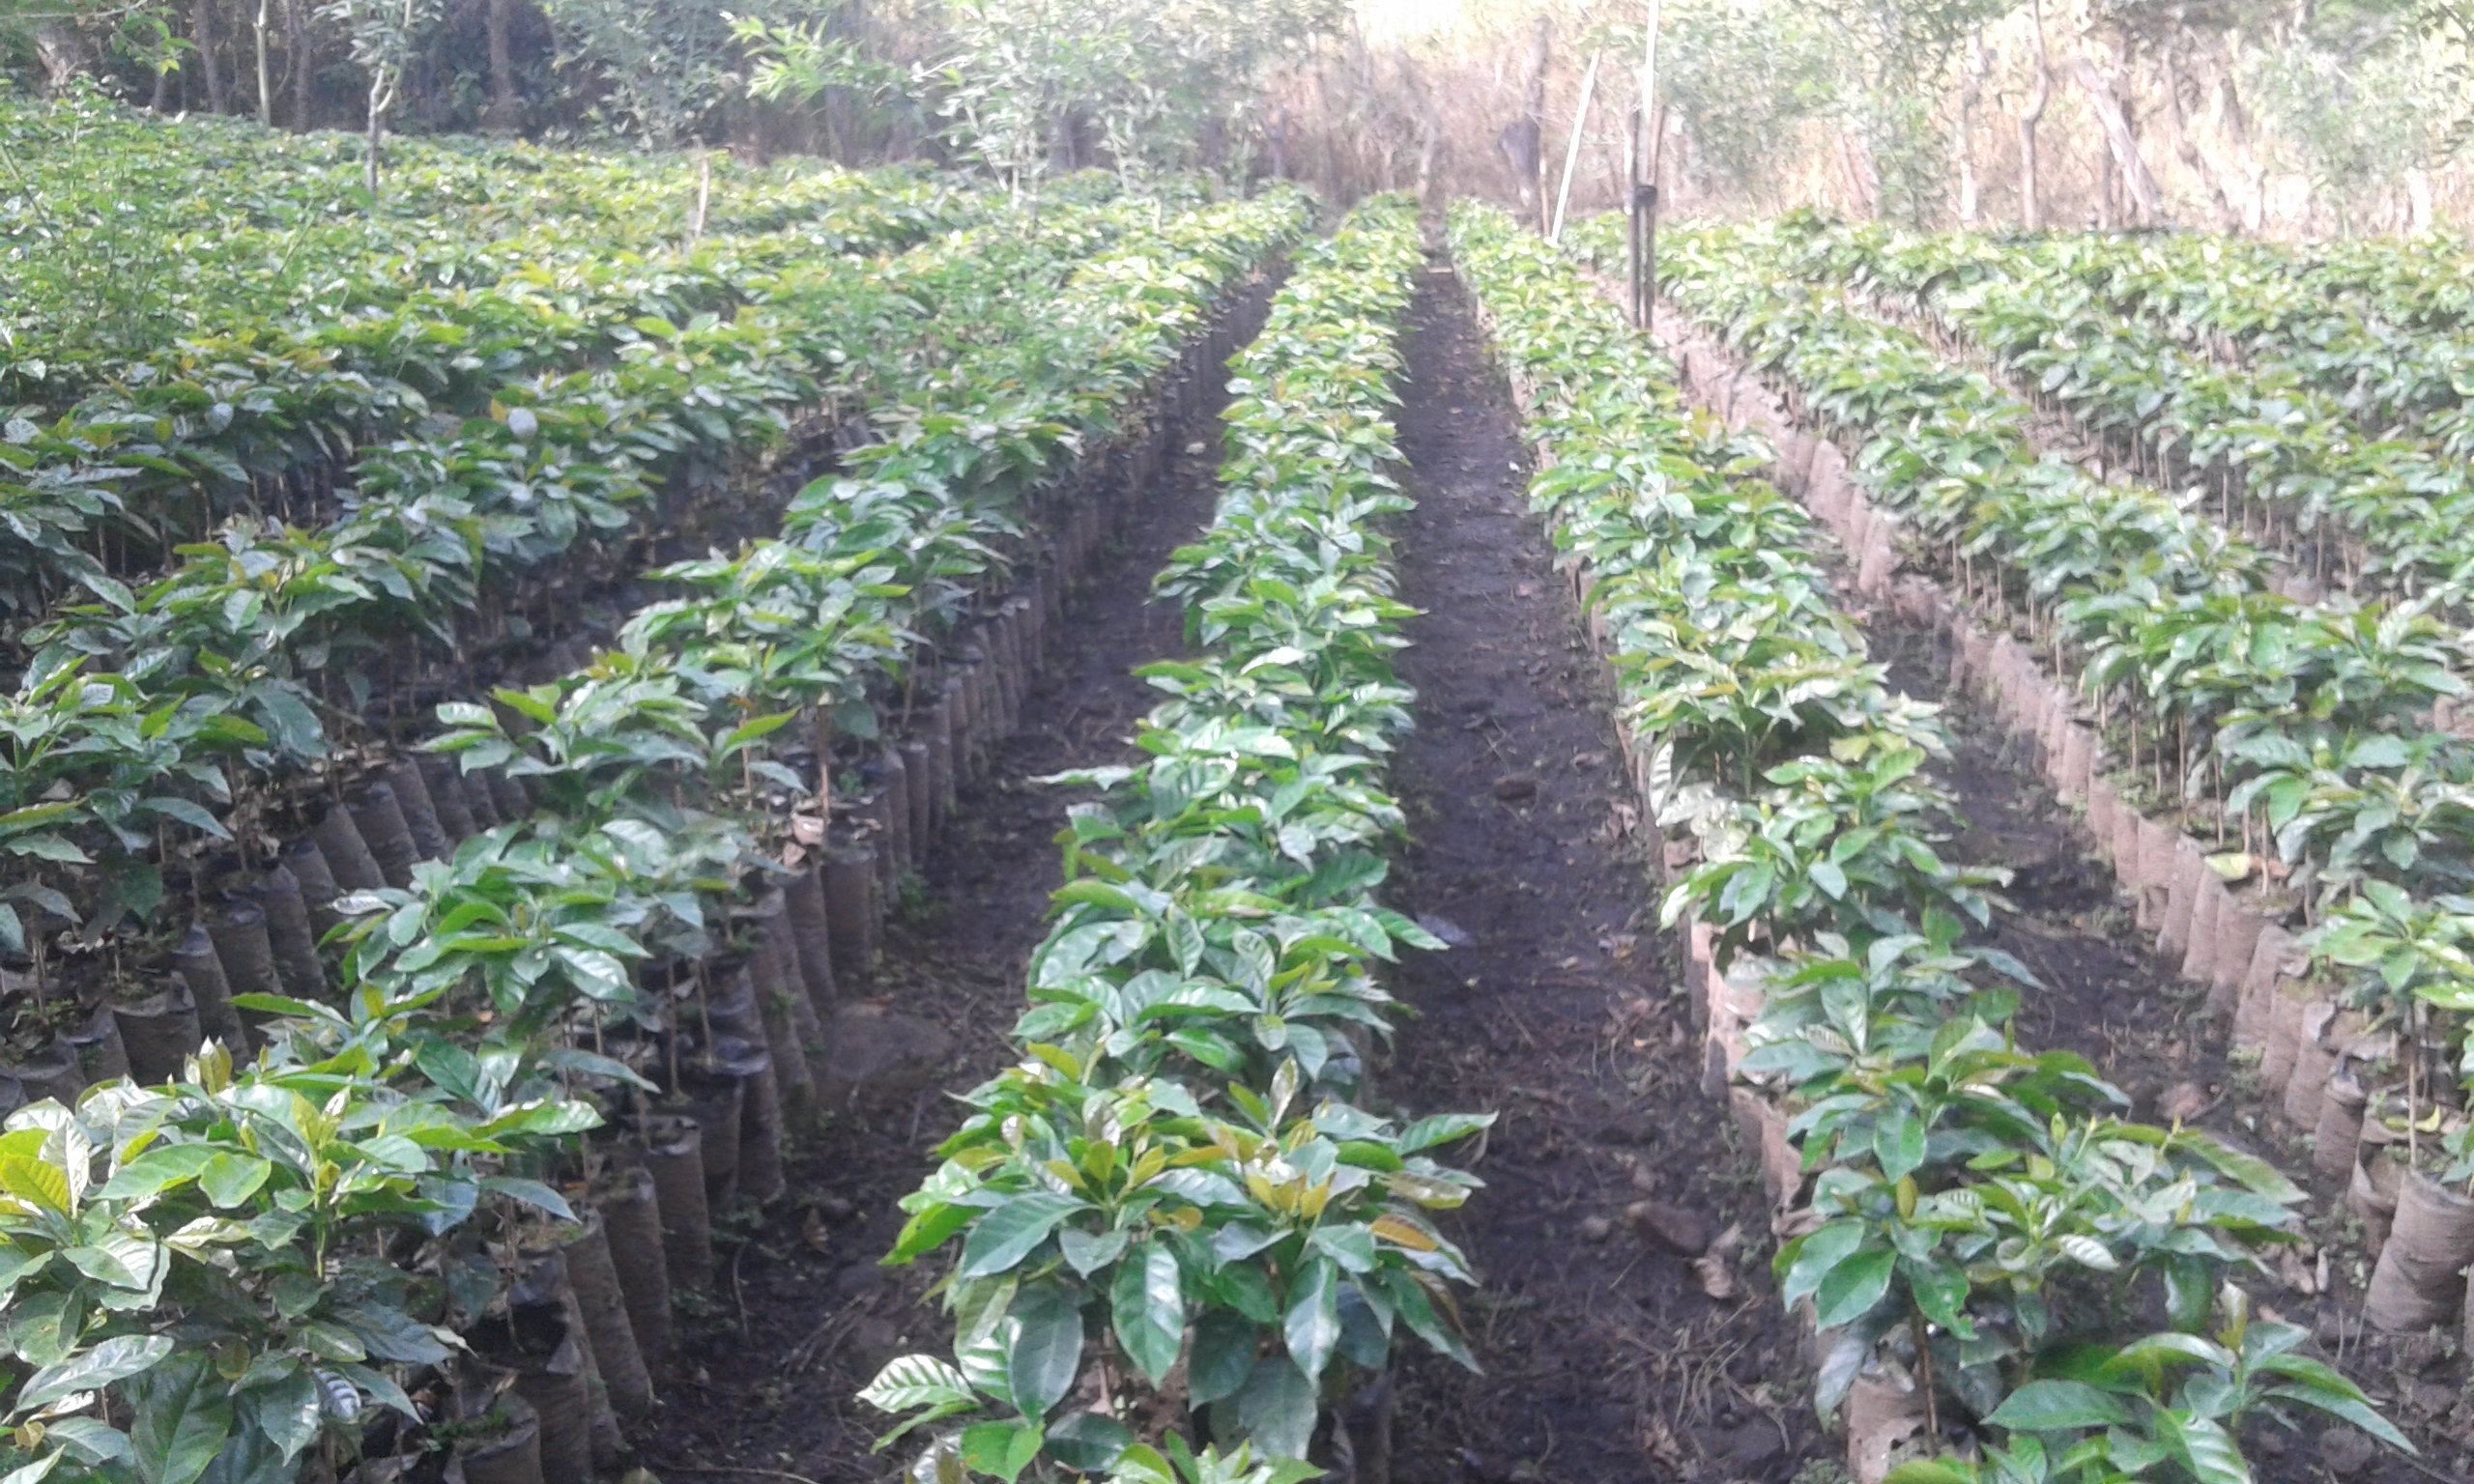
As you fill all your bags, they need to be placed in rows. You must be able to walk through the furrows of bags to check them constantly and ensure you can reach every single bag when you fertilize them.
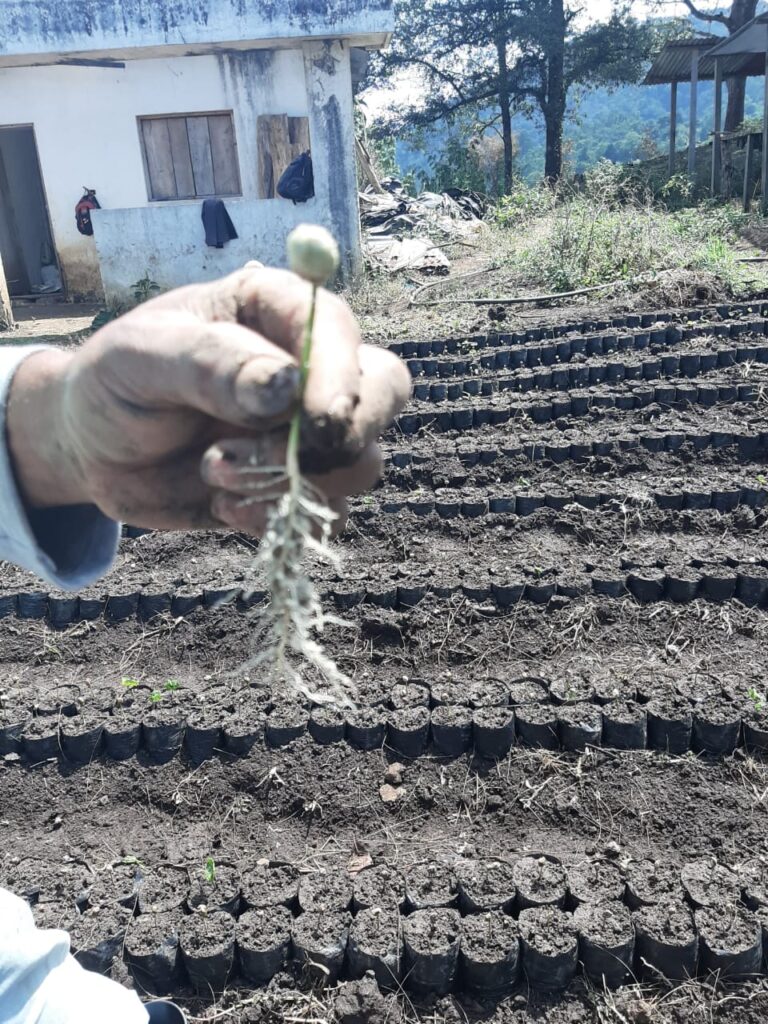
ANACAFE 14 Seedling at Finca Las Ilusiones, Oratorio, Santa Rosa, Guatemala.
After being nursed for about 6 to 8 months, your young coffee trees will be ready to be transported and planted at their final destination. The holes should be made at least once more before bringing the plants. This way, the planting process will be faster. In the next article, we will get into more detail about how to transplant them from the bag into the soil, spacing between plants, and considerations to keep in mind when managing your plantation.
ANACAFE 90 seedling at El Chorro coffee plantation. Melchor, Santa Rosa Guatemala.
References
-Guía técnica para la elaboración de viveros de café, ANACAFÉ 2022, Eder Gonzalez Arias.
https://www.anacafe.org/manuales/guia-de-viveros/
-Semilleros y viveros de café, USDA & TechnoServe 2015. www.mocca.org
-Manual para la producción de semilla certificada en México, by Grupo Técnico Interdisciplinario de Café, SAGARPA
Coffee Plant Information – Morphology
Coffee Genetics and Variety Selection
How to Select, and Treat Coffee Seeds
Germination of Coffee Seeds and Creation of Seedbeds for Planting
Coffee Trees Planting and Plant Spacing
How to Prune your Coffee Trees in an Agroforestry System
Shade-Grown Coffee in an Agroforestry System
Coffee Tree Flowering and Pollination
From Rainwater Harvesting to Irrigation of Coffee Trees
Coffee Tree Fertilization Requirements
Weed Management in a Coffee Plantation